Stencil - according to Wikipedia, is a special device that is used when a symbol or pattern needs to be applied to the surface of something. In this case, symbols mean either letters or numbers, various images and other signs. The image created by using this device is also called a stencil. At their core, stencils are paper sheets or sheets of film, plastic and even metal. A pattern or image of something is cut out on the sheets, and the pattern is not cut out in one piece, but in the form of through holes, which create segments of the whole image. The process of making such templates involves breaking one picture into several segments so that the image is 100% readable, and the cliche remains intact (does not tear).
Secrets for drawing on coffee with milk foam
For proper foam, heat and whisk the milk. This can be done with a steam wand in a coffee machine, a pitcher (a small jug with a spout), a cappuccino maker (whisking machine), a whisk, a mixer, a French press (a kettle with a piston, which is popularly used as a tea infuser) and a shaker .
Do not forget that the foam must be strong enough to maintain the pattern for thirty minutes. This one consists of small bubbles, and before creating a design you can find out its quality by sprinkling it with a small amount of cinnamon. If the spice remains at the top, then the foam is good and suitable for creating designs on it.
The foam must be poured quickly, at an angle of 45 degrees, into the heated cup so that the drink remains hot for as long as possible. You can add syrups; they not only diversify the taste, but also add color to the design.
Beautiful coffee
Just a couple of years ago, the idea of decorating coffee or drawing on its surface would have occurred to few people. But, nevertheless, there were creative individuals who laid the foundation for such art as latte art, that is, the art of drawing on the surface of coffee.
There are several techniques that can be used to draw a flower or a heart on coffee foam. Real masters, called baristas, usually draw patterns with milk. Those bartenders who have not yet acquired such skills draw various patterns using a toothpick or other sharp object by “smearing” milk on coffee foam.
If you are not a pro at latte art, you are unlikely to be able to create a beautiful picture the first time. But this does not mean that you need to give up the pleasure of drinking not just delicious coffee, but also beautiful one. Stencils for cappuccino were created especially for this purpose . The uniqueness of the device for drawing on foam is that you can buy it ready-made or make it yourself. In the first case, you can save time, and in the second, you can not only save on purchases, but also create a unique and inimitable design. You can pamper not only yourself, but also a loved one with such a delicacy as a cappuccino with a pattern or a latte with a floral pattern. Moreover, the templates can be in the shape of a heart or the initials of a loved one. Of course, you are unlikely to be able to reproduce a portrait of a loved one on coffee, although a professional barista can cope with such a task, but decorating a drink with an unusual pattern is very simple, the main thing is to be creative in creating the template.
Basic techniques
Here we will talk about many techniques for drawing on milk foam, most of which are the author's own. But here we will look at the most basic and simple ones:
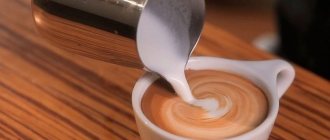
- Pitching. We use a pitcher, pour foam into the coffee, while creating the desired pattern.
- Etching. We use the pitching technique, at the very end we draw small details using toothpicks, brushes, and wooden sticks. Often used in trendy coffee shops, they depict pointed and graceful objects, but especially patient baristas, deciding to lift the mood of customers or cheer them up, create more interesting works.
- Mixed technique. We combine the first two techniques, add auxiliary products, chocolate glaze or cinnamon water. Nowadays it is very popular to use the latter; the foam turns brownish, and the designs come out more expressive.
- Volumetric latte art technique. This technique is an opportunity to express yourself in a creative way. Various figures are created on the surface (celebrity faces, animal faces).
The use of dyes and sprinkles is also acceptable here. Most often used by masters of their craft.
Step-by-step instruction
There are several questions that interest novice artists about what they paint on coffee:
- What can you decorate using a stencil?
- How to make a cappuccino stencil with your own hands?
- what material is better to use?
- Do you need anything else besides a template?
You can decorate anything, but if we talk specifically about coffee, then it’s not for nothing that the device is called a cappuccino stencil, since it was created specifically for applying designs to the surface of a latte or cappuccino. This is very simple to do, just prepare the drink, pour it into a cup and, using a strainer, sprinkle cocoa, Nesquik powder or cinnamon onto the surface through a cliche. In this case, the cappuccino stencil should not touch the liquid, which requires a certain amount of care when using it (so that the design is clear and easy to “read”). The same principle is used to create and use stencils for baking and confectionery products. True, powdered sugar and other food additives can be used as a topping in this case.
Making cliche models is very simple. If you decide not to buy a ready-made one, but to make it yourself, then you will need imagination and a design you like. The selected picture needs to be printed and a hole cut out along its contours. Since paper can lose its rigidity and strength when exposed to moisture and steam, it is better to make stencils from plastic. If you don’t have plastic raw materials on hand, and you need a reusable stencil for cappuccino, it is recommended to cover the inner edges of the template with tape. By the way, the diameter of the device should be slightly larger than the coffee container.
A variety of cliches can be made not only in the form of flowers and animals, but also zodiac signs, and even entire congratulatory phrases. The main thing is to calculate it so that the inscription fits on the drink and is easy to read.
Return to content
Master class from a real “Barista”
Coffee is a special and capricious drink; only if you follow certain instructions can you prepare something worthwhile; the rules will also be needed when creating a drawing. Latte art, although it requires knowledge and skills, is also a creative activity and requires constant training and practice. It doesn't hurt to have a mentor in this matter, so we've collected some unexpected tips and interesting discoveries:
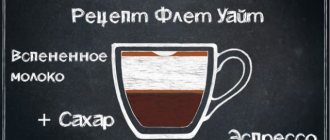
- Almost all coffee drinks are based on espresso. Its proportion is small: about 30-50ml. You can diversify the taste by adding milk, syrups, spices, sugar, salt or pepper. But to get a really good drink, you need to take care of the quality of the base.
- In order to create 3D images in your cup, you need to create a thicker foam.
- Using a French press will retain the most caffeine than if we used other brewing methods.
- We use the pitcher so that both milk and foam pour out of it at the same time. Only in this case the drawing will be successful.
- Coffee brewed in a coffee maker already has foam, so the resulting mixture will have a delicate beige color.
- The higher the fat content of the milk, the creamier the drink will taste.
- The quality of water also greatly affects the taste of the drink; you should not use hard tap water, this can change the taste of coffee for the worse or completely destroy it.
What can be decorated
Coffee stencils are the easiest way to decorate a cup of cappuccino or latte. To do this, you just need to pour coffee to the brim of the cup and sprinkle Nesquik, cocoa or cinnamon on top through a stencil using a sieve. The stencil should be placed so that it does not touch the coffee, and then carefully remove it. Such stencils can also be used for pastries, cookies and cakes to make a “picture” out of such a dessert.
The beginning is the same for everyone:
- Preparing espresso
- Foam or whisk chilled milk.
- Pour it into the center of the mug, holding the pitcher 5 centimeters from the surface.
heart
We create a milky circle in the center of the cup, bring the pitcher's nose closer and sharply draw it downwards. The lines will tighten themselves in the direction of movement. The drawing is ready.
Bunny
Using a pitcher, create a circle and a heart of the same size on top. Using a toothpick, add small details: muzzle, ears. You can decorate it with syrups, cinnamon or chocolate. The drawing is ready.
Chocolate flower
Here you need to put a small amount of foam in a separate container. Take a glass of ready-made coffee and use the pitcher to create two circles. Place the reserved foam in the center, and then trace the outline with melted chocolate or syrup. Using a toothpick, make movements from the edges to the center. The drawing is ready. After the “classic” flower, let’s try to draw a tulip. We create several small hearts, they should be located close, and then we cross them with a milky stream - a “stem”.
Star
The star pattern looks like a “chocolate flower”. A white circle in the middle of the cup, use a toothpick to draw four lines to the edges. Damn, the drawing is ready!
DIY cappuccino stencil
To make a stencil for cappuccino at home you need to prepare:
- stationery knife,
- scissors,
- marker,
- a printout of the design you like,
- scotch.
As the main material, you can use not only printer paper, but also cardboard and even plastic lids. Plastic cliches (from yogurt lids) are more convenient and durable.
You can download blank drawings from the web and print them. Then, using a stationery knife, you need to cut out the light areas of the drawing. Later, by placing the blank on a denser material (cardboard or plastic), you can cut out true templates, which will be used for “drawing”.
Latte art scientists believe that perfect cappuccino stencils are made from thin sheets of wood and varnished. Such stencils make it possible not only to make a clearer picture, but also to use them virtually forever. Well, in order for the image to be not only accurate, but also uniform, you need to sprinkle cocoa or cinnamon, powder or Nesquik through a strainer.
Why decorate a drink with some kind of pattern if in a couple of minutes the picture will be destroyed? This particular question is asked by people who do not understand that taste and beauty are concepts that go hand in hand. After all, it is always more pleasant to enjoy something beautiful and tasty than just a drink or dish that tastes good.
By the way, professional baristas are very highly paid and valued scientists, which again confirms that there is and will always be a demand for beauty. Well, stencils allow you to enjoy better drinks at any time, even at home, than in a restaurant or bar.
5 tips for using coffee stencils.
It is no secret that coffee is one of the most popular drinks, and it attracts people not only with its invigorating taste, but also with its unique appearance. The art of latte art, or drawing on the surface of coffee, is not at all as complicated as it seems at first glance, because in order to make an elegant contrasting design on coffee foam, special stencils for coffee have long been invented.
Coffee stencils are used by both professional baristas and ordinary people who, having mastered this easy skill, can amuse their loved ones not only with a tasty, but also a very beautiful coffee masterpiece every day. All that is needed for such a truly unique morning surprise is a set of coffee stencils and a bulk product that contrasts with the main tone of the coffee (it can be cinnamon, cocoa or sweet powder).
Do you understand? The art of drawing on coffee has gained such widespread popularity that since 2004, special championships have even been held among those who have this skill.
Our useful tips for decorating coffee using pastry stencils will help you quickly master this easy but beautiful technique.
Tip 4. How to help the drawing last longer?
In general, the pictures on the surface of the coffee are short-lived, which is why it is necessary to serve such coffee immediately after decoration. In general, there are some methods to extend the life of the decoration, and the main thing here is the thickness of the foam. It is believed that more long-lasting pictures are obtained with cappuccino to which cream has been added - the thicker the better (you can even use aerosol ones from a spray can).
Instead of cream, you can add ice cream to a cup designed for coffee and let it melt a little. As you carefully pour coffee into this cup, you will notice that the ice cream rises and forms a foam that is completely suitable for drawing through a stencil. If you have a blender with a whisk attachment, thick foam just comes out of the full-fat milk in just a minute on turbo. Having laid this foam on the surface of the coffee, it will not be difficult for you to draw any sketch on it.
Tip 5. For those who want to make their own sketch for the stencil
If you want to make your own sketch on coffee, remember that not every story will look equally perfect on coffee foam. When developing a sketch, beware of small details, since when applying the bulk mass through a stencil, they can merge with each other.
It’s better if your sketch is somewhat sketchy, but simply understandable for the person you decide to treat. Also remember that a cup of coffee has a round diameter, which means that the sketch should fit moderately into the circle: it is recommended to avoid elongated and inharmonious subjects.
How to sketch on coffee foam.
A cup of coffee... not just coffee, but coffee with a design, with an invention. What could be better? It’s especially nice when you don’t have to go anywhere for this kind of coffee. And it’s even nicer if you can give such a gift to your loved one. In this master class you will learn how to draw on coffee using stencils.
how to draw on coffee
Such stencils will greatly simplify your work! Drawing on them on coffee is painfully simple and entertaining. In addition, you will receive a wonderful decoration for the drink and will please the person for whom it is intended.
So, when starting to draw, prepare:
- Coffee
- Cup
- Boiling water
- Cocoa powder
- Tea sieve
- Little milk
- Stencil (it should be larger in diameter than the cup itself!)
Let's start! Prepare coffee and add a little milk to it. Cover the cup with a stencil. We take a small amount of cocoa powder into a sieve and shake it well over our stencil. Then this stencil must be removed, but so that the remaining cocoa powder does not crumble. Well, the coffee is ready and you can serve it!
And now a few words about the stencils themselves and how to make them.
Oh that's how they are made. To do this, you just need to save the sketch that you like on your computer, print it and cut out its blacker part, in other words, the drawing itself. You can also attach a snow-white sheet of paper to the monitor and simply draw a stencil, and cut out the excess later.
coffee stencils
This way you can find and use any picture for a stencil! Save it in the same way, print it out and cut it out along the outline. And in order to make your stencil more durable, you can glue it to thick cardboard and cover it with transparent tape on top. Well, wonderful coffee with a pattern for every day is ready!
DIY coffee stencils.
Nowadays, coffee has become the favorite drink of many, which is why latte art has become very popular. Few people have such skill, although they are so eager to drink not only a tasty, but also a wonderful drink. For this purpose, special stencils have been invented that can be used to make any sketch on coffee. Such a stencil will turn an ordinary cup of coffee into a whole story.
If you truly love coffee, then why not make a true work of art from this drink. So, you can do something nice not only for yourself, but also for your other half.
Coffee pictures have now become very popular in almost all coffee shops. Baristas make such pictures not only of ordinary shapes - butterflies, hearts, but also of your portraits, which is quite expensive. And with the help of ordinary stencils, you can make a real masterpiece at home in a matter of seconds. To do this, you need to have a stencil and cinnamon, or cocoa, or sweet powder.
How to make a stencil
To prepare such a masterpiece, you just need to brew coffee, add a little milk to it and prepare a strainer. Pour coffee, cocoa powder, grated chocolate, cinnamon or sweet powder onto this strainer. Take a stencil, place it over a cup and shake a strainer over the cup onto the stencil. The stencil should be slightly larger in diameter than the cup. You should not touch the foam or the coffee itself with the stencil.
The stencils themselves can be purchased at the store or made independently. The most common method for making a stencil is to print out a regular sketch and cut a hole along its outline. To make a more than one-time stencil, you can cover a sheet of paper with tape or make it out of plastic.
Using a stencil you can apply any inscriptions, congratulations or pictures. If you prepare coffee or a confectionery product, and later make some kind of inscription, then you can congratulate you on your birthday, happy new year, or any other holiday.
A stencil inscription will always give positive emotions to those to whom you give such a gift. You can get great pleasure from such a cup of cake.
Such stencils can also be ordered on the Internet, but, of course, you can prepare them yourself. To make stencils, you need to prepare a stationery knife, scissors, stencil printouts, a marker, etc. if necessary, tape.
Tip 2. What should be the stencils for coffee?
The diameter of the stencil should be slightly larger than the cup. One-time stencils for confectionery products are made simply: just print out one of the pictures offered on the Internet and then cut out the light areas with scissors.
It is important that the stencil has a tail, by which you can carefully pull it and remove it from the cup. To make a reusable stencil, instead of paper, take cardboard and, after cutting it out, cover it with tape, or better yet, take plastic, for example, a yogurt lid.
It is not easy to process thick cardboard, and especially plastic, with scissors and tape. That’s why it’s often even easier to purchase coffee stencils than to make them yourself. Online stores now offer a wide variety of stencils for painting on coffee, including in sets. Their theme can be very different, and the pictures are specially designed to be easy to read and last a long time on the foam. You will find wonderful stencils in our catalog.
Tip 3. How to hold the stencil over the cup correctly?
The main rule of aesthetic decoration is that under no circumstances should you touch the coffee or its foam with the stencil. If you carefully prepared the coffee, observing all the proportions, then you can simply put a stencil for decorating the coffee on the cup.
But in this case, when the coffee foam is very voluminous, you will have to hold the stencil suspended with one hand, and sift the cocoa or cinnamon with the other. In general, the closer the stencil is placed to the foam, the more clear and understandable the sketch will be.
Perhaps the most difficult thing about using a coffee stencil is learning how to carefully hold the sketch over the foam without touching it. If at first it seems to you that there is a danger of smearing the foam, when decorating the coffee, place the cup at eye level or try to work together.
Stencil material
As for materials, both cardboard and thin plastic caps are suitable for the stencil.
First you need to find the necessary stencils on the Internet, print and cut out the lightened areas with a stationery knife. Then apply the standard to a dense material and cut out a finished stencil from this material.
If you decide to use cardboard for this, it is better to cover it with tape after cutting it out so that the stencil can be used a couple of times. But it’s best to take plastic - these can be yogurt lids or something else. A plastic stencil will last longer.
If you know how to carve wood, then this will be the best option. In this case, you can cut a stencil out of wood, coat it with varnish and use it virtually forever. The main thing is to make a uniform sketch, which is why it is better to use a strainer.
