The coffee grinder capacity is 45 g of coffee beans, which corresponds to 10 cups of coffee per grind. Remove the electric motor from the housing and remove the oil seal 12 from its shaft, and the rubber shock absorbers from its shields. The design of electric coffee grinders must include one or more of the following structural elements that characterize the versatility of use and the perfection of auxiliary operations: the possibility of organized storage of the cord; presence of a switch; the ability to monitor the food processing process; the presence of a dosing measuring device; presence of a timer. True gourmets prefer loose coffee of all varieties. Unscrew and remove the divider. How it works: COFFEE GRINDER – How It's Made Serial
To eliminate these problems, use a probe or ohmmeter to check the serviceability of the cord, connect and isolate the place of breakage or poor contact. Coffee grinder - Fig. Unscrew and remove the divider. And if you use the device for other than its intended purpose, then the rate of its failure increases significantly. The electric motor is turned on by pressing the microswitch button. All their structural components are the same.
Coffee grinders produced in a long-defunct country are not inferior in productivity to their modern counterparts. Hold the impact mechanism divider with your left hand, and use a screwdriver to unscrew screw 17 located on the bottom of the coffee grinder body with your right hand.
DIY COFFEE GRINDER Repair
How to disassemble
Coffee grinder devices have a simple disassembly scheme that anyone can handle. The main thing is to study the sequence of the algorithm.
All coffee grinders come in two types:
- with a knife device;
- burr mills.
Models with a millstone device have a separate mechanism for disassembling the grinding mechanism. Moreover, each model may have a different parsing process. But they have common features:
It is worth paying attention to the fact that the devices have conical knives attached to the drive shaft using 3-4 bolts
They can be easily unscrewed with a screwdriver; When reassembling, it is important to ensure that the bolt heads fit exactly into the seats; If the bolts are loosely tightened and not fully tightened, this may further lead to failure of the device. Also, small metal particles will constantly be found in the grinding, this may be due to the fact that the protruding parts of the fasteners will be in the area of movement of the grinding device ; Disassembling the casing of coffee grinders is quite simple. To do this, several screws are unscrewed on the lower plane, at the bottom of the device.
Access to the mounting components may be open or may be blocked by the legs of the device; a separate group of grinders may have latches. To do this, you should use special probes or screwdrivers, with which you can bend the latches.
Engine
An important part of the device is the motor. In order to dismantle and inspect this element, it is recommended to remove the knives. They can be removed using several methods:
- When the knife moves clockwise, a left-hand thread is usually applied to the joint surface. To remove, a screwdriver is placed in a special slot and turned clockwise;
- When the knife moves counterclockwise, the connection has a right-hand thread. Accordingly, the screwdriver probe is also placed in the slot and turned counterclockwise.
Engine and knife
Over a certain period of time, the fastening part becomes clogged with particles from grinding. It can also be negatively affected by oxides. To remove all this, you should use special lubricants; these products can also make the process of unscrewing the knife blocks much easier.
If the clamping nut has a conical thread and is made of bronze metal, then it is worth warming up the area with the connection a little. You can use a soldering iron to warm it up.
The subsequent process may depend on the grinder model. In any case, disassembling the device must be careful and accurate, during it it is necessary to monitor the limiters, all elements must be correctly removed from the grooves.
After the knives are removed, you only need to perform a few steps:
- The fixing nut from the plastic base is unscrewed. It provides fastening of the grinding glass;
- When unscrewing the fastener, you should keep an eye on the felt base gasket. Under no circumstances should it be lost;
- then the axle washer, which is made of a metal base, is removed;
- then the blocker plate is removed. To do this, it is carefully pressed downwards and removed from the area with restrictive grooves.
Typically, for most models of coffee grinders, the disassembly process ends with removing the dirt washers and dismantling the power cable and switch. Often, during the process of disassembling the device, it can be revealed that the breakdown occurred precisely because of the washer, for example, it burst or completely collapsed.
Repairing a coffee grinder is not difficult, the main thing is to properly disassemble the device. During disassembly, the sequence must be followed, which will also need to be followed during the process of putting the device back together.
If during disassembly it is revealed that some element is broken or destroyed, then it is better to find out the details of the component parts for the coffee grinder model; this can be found on the Internet or in the instructions. Then you can go to a store or market to purchase the part exactly by number and series.
What materials can they be made from?
When making a homemade coffee grinder, you need to decide in advance what material the body, internal filling and other parts will be made of. Today the following raw materials are used for the production of devices:
- plastic;
- metal;
- stainless steel;
- titanium coated metal;
- ceramics.
The body of the device is often made of durable ABS plastic, as well as metal. The first option will be lightweight, but over time the case may wear out. The metal case is more reliable, however, during operation the weight of the product is felt.
Coffee grinder millstones are made from 3 types of raw materials: ceramics, titanium-coated metal and stainless steel. Ceramic parts do not heat up and are resistant to moisture, but can fail if a foreign object enters. Metal options are durable and reliable; those with titanium coating will last much longer.
Important!
The only disadvantage of metal millstones is that they heat up during operation.
If moisture gets on the surface of metal millstones, they can deteriorate, which significantly changes the taste of the finished drink for the worse.
How to set up grinding operation
In a manual coffee grinder, the grind size is adjusted using a manual adjustment. As a rule, the trim screw is located at the point where the rotating millstone is attached. By screwing it in or loosening it, you can achieve a gap size between the millstones at which the particle size will be optimal. However, you should not overdo it when reducing the gap. If you set it too low, the metal surfaces will rub against each other, creating small shavings that will mix with the coffee and end up in your food.
If a rotary coffee grinder with rotating blades is used, the time for complete grinding is determined by visual inspection. To do this, turn off the coffee grinder, open the lid and assess the degree of readiness. If the powder is not fine enough, the procedure is repeated. Many coffee grinders of this type usually have a lid made of transparent plastic. This allows you to control the grinding process without removing the lid or turning off the engine.
If the coffee grinder operates on the principle of grinding with millstones, then the degree of grinding is regulated using a special adjustment device. This mechanism allows you to increase or decrease the gap between the rotating millstones, and thus change the size of the powder at the exit. In practice, this is expressed in the rotation of the adjustment wheel located on the coffee grinder body. The adjustment algorithm is quite simple. Rotating the wheel in one direction increases the fraction of ground coffee. In the opposite direction - to decrease. In everyday life, everyone can, with a little experimentation, achieve the desired degree of grinding of grains.
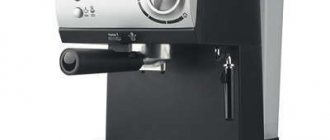
Design of the electric coffee grinder EKMZH-125
Remove the electric motor from the housing and remove the oil seal 12 from its shaft, and the rubber shock absorbers from its shields. The degree of grinding is adjusted by turning the knob 8; finer grinding is achieved by turning the knob in the direction of increasing the diameter of the marks. The coffee grinder is turned on by pressing the microswitch button. There are easily people who still successfully use Soviet household appliances.
Inside the body, remove the button spring from the groove and remove the button from the hole in the coffee grinder body. You can use motor oil from your car using a thin screwdriver. Disassemble and lubricate. The engine is removed from the housing along with the locking device. To eliminate these problems, use a probe or ohmmeter to check the serviceability of the cord, connect and isolate the place of breakage or poor contact. Hold the impact mechanism divider with your left hand, and use a screwdriver to unscrew screw 17 located on the bottom of the coffee grinder body with your right hand.
Not so long ago, coffee beans were ground mainly by hand mills, and only with the advent of coffee grinders with electric motors was this process mechanized. After such repairs, the coffee grinders still worked for several years.
An electric motor with an interference suppression device is installed in the plastic casing of the coffee grinder. Rubber shock absorbers are installed at the bottom 1 of the coffee grinder body. HOW CURRENT FLOWS IN THE CIRCUIT - Read Electrical Diagrams Part 1
How to disassemble a coffee grinder: repairing an electric coffee grinder
You will need:
- Preparing the work surface
- Screwdriver
- Sharp object
- Instructions for the equipment
- Troubleshooting
#1
The first thing to do is to thoroughly wash the coffee grinder and prepare the work surface. The question of how to disassemble a coffee grinder turns out to be not so difficult, especially if we are talking about a mechanical model.
Disassembling an electric coffee grinder is a much more labor-intensive task, largely due to possible problems with the wire and plug. If we are talking about a complex electrical mechanism with several modes and a power supply, then it is better not to undertake independent repairs, because there are many parts in the equipment.
This equipment should be disassembled into parts on a flat and clean surface.
The mechanism of the coffee grinder itself is extremely simple, but this thing contains a dozen small bolts and nuts, and it is important not to lose any of them. You should start disassembling the coffee grinder only after its surface is completely dry.
#2
To disassemble such equipment you will need several screwdrivers. The first step is to remove the knife, which is used to grind the coffee beans. Typically, the nuts securing the knife inside the coffee grinder are located at the bottom of the equipment
Remove the knife carefully so as not to damage the fastening element
Usually the blades of such a part are very sharp, and it is important not to get hurt. Turn the screwdriver counterclockwise
Usually the nut comes off quite easily, and the process itself takes no more than a couple of minutes.
Between the surface of the body and this important part there is usually a thin disk, which is extremely necessary for the normal operation of the coffee grinder. All these three details should be immediately put aside, remembering how they were located
#3
In many electric models, the cover is attached to the base not with nuts, but thanks to a special mechanism, and it is not easy to cope with it without improvised materials.
This is why a person needs to take a thin and sharp object, such as a knife, and try to insert it into the tiny gap between two pieces of equipment. Next, you need to lightly press on the base and turn the knife in one direction and the other.
This is usually enough to keep the two parts of the grinder free from each other.
By the way, electric models are usually made of plastic, so you need to act extremely carefully so that the base or cover does not crack
#4
Without instructions for a coffee grinder, it is simply impossible to eliminate possible breakdowns of the equipment. Typically, such a brochure indicates not only the name of each part, but also its technical purpose, as well as an approximate appearance. Often the process of assembling equipment is also prescribed there.
After cleaning all the parts, a person will be able to determine exactly why his equipment began to work worse. One of the most common problems is the dullness of the blades of the knife, which grinds the grains. After checking the blades for sharpness, a person can sharpen them or replace the knife with a new one.
If we are talking about an electric coffee grinder, then the problem may be in the cord with which the equipment is connected to the power supply. The cord must be disconnected and the safety of each wire checked.
#5
At first glance, there is nothing difficult in assembling a coffee grinder, because when disassembling it, a person automatically remembers the sequence of his actions.
It’s just that the variety of small screws and nuts with which elements of equipment are fastened often makes the home craftsman think about his actions. The first thing to do is screw the knife back on.
To do this, the same screwdriver will be used, but you need to rotate it clockwise. Next, you should attach the handle to the lid of the coffee grinder, and only then begin attaching the two parts to the base of the coffee grinder.
Caring for your manual coffee grinder
After grinding coffee, when many people look at a manual coffee grinder, the question often arises: what is the best way to wash it? Convenient cleaning of all internal elements greatly simplifies the maintenance of the device. The main components that need to be cleaned after completion of work: the millstones, the bean container and the container for the finished coffee powder. Each coffee grinder needs to be cleaned differently: this is where the instructions for use will come to your aid.
The millstones cannot be washed under running water; they only need to be thoroughly cleaned with a small brush and wiped with a cloth.
Causes of breakdowns and prevention
The simplest and most common cause of malfunction of any coffee grinder is clogging. Powder and external debris often get under the propeller and get stuck there; in cheap models, they accumulate inside the housing, threatening the motor with overheating.
Sometimes the device refuses to work not because of a breakdown, but because of sensitive sensors. Modern rotary coffee grinders are equipped with fuses that prevent the motor from starting if the lid is not completely closed. If coffee powder gets into the grooves for the spikes, the sensors detect insufficient tightness. Such a gap is often not noticeable to the eye.
If you use the device for purposes other than its intended purpose, for example, grinding salt or pepper, there is a high probability of jamming the rotary screw. Salt also causes rust, which is not at all desirable. To wash the bushing and screw, it is better to use alcohol, which evaporates quickly and does not increase the humidity inside the device.
Burr coffee grinders are more likely to suffer from electronic malfunctions than from clogging. In particular, the capacitor fails - it can be completely replaced if you have a soldering iron and solder in the house; it is not difficult to find an analogue in any radio parts store.
Analysis of the electrical fault of the Zauber Z-490 coffee grinder is in the video below.
There are also complaints on forums that the rotation screw does not unscrew. If it is clogged at the axle or rusted, it is enough to dab it with alcohol and leave it for a while. If the plastic base in which the blades are held is flattened or otherwise deformed, it will either have to be drilled out or a screw/nail fused into it and then removed.
Prevention
To avoid problems, just follow a few simple rules:
- Store the device in a dry place, do not wash, but only sweep or wipe.
- Clean the device from time to time (small ones with a brush or brush, large ones with a vacuum cleaner and a brush), this is vital for millstone models; semi-professional devices need general cleaning every 2000 servings.
- Do not exceed the permissible load, this applies to both the volume of loaded grains and the duration of one grinding session. The instructions for most rotary coffee grinders indicate a limit of 2-5 seconds, after which the device needs to “rest” for the same amount of time.
- Use the device only for its intended purpose.
Modern coffee grinders are often more powerful than Soviet ones, but are inferior to them in terms of durability, especially when it comes to rotary ones. Millstones are designed for more frequent use, but, as practice shows, they are often let down by electronics. Today there are many service centers ready to service the coffee grinder, but if you follow simple rules, the unit will last a long time without repair.
Key points when constructing a coffee grinder with your own hands
When making a gadget with your own hands, the advice of people who have already proven themselves in engineering when making a coffee grinder will be useful:
- instead of millstones, an emery wheel is used - it is ideal for this purpose;
- do not forget about installing the mesh, it will regulate the degree of grinding;
- if the device has a correctly installed mesh, then the holes and protrusions on the product will coincide;
- For the protection and reliability of the structure, it is recommended to attach 3 loops on the bottom and ceiling of the machine - this can avoid emergency situations.
A self-made coffee grinder will delight you not only with the quick production of raw materials for the drink, but will also give you an unforgettable design experience. If the product is beautifully decorated on the outside, it is quite suitable as a gift to loved ones.
Good day to all, dear friends! In today's article I would like to show you a rather interesting homemade idea. Today we will look at a homemade product that lovers of good coffee will surely like, namely, we will look at how to make a coffee grinder. Many of us don't like instant coffee, and many of us are completely tired of it. And many people at least wanted to drink real aromatic coffee for breakfast, but it all ended in the absence of a coffee grinder. The coffee grinder we will assemble will do its job perfectly. And also one of the features of a homemade product is that it will consist of the most simple and accessible materials that you will probably find in your home or garage. In general, the homemade product is very interesting, so let’s not delay with a long introduction, let’s go!
For this homemade product we will need:
— A sheet of plywood measuring 1*1 m. — An empty can of large polyurethane foam — Furniture nails — Metal plate — ORG glass (not a large piece) — 550 class commutator motor (the kind often installed in ordinary screwdrivers) — Adapter for the electric motor shaft — Self-tapping screws — Metal washers - Screws and nuts - Switch - Wires - 12V DC power supply.
We will also need the following tools:
— Heat shrink — Soldering iron — Solder — Ruler — Marker — Drill and set of drills — Hacksaw — Hammer — File — Screwdriver — Hot-melt glue — Jigsaw or ordinary hand saw. - Super glue.
Well, let's start assembling our homemade product. To do this, first, on a sheet of plywood you took (the plywood should not be thick), you should mark all the necessary elements using a ruler and marker. You can see all the necessary plywood elements in the image below (we’ll look at what, where and why below). After we have marked all the necessary elements on a sheet of plywood, we cut them out using a jigsaw.
The next step is to make an element that will grind coffee. To manufacture this structural element, we need to take an empty polyurethane foam container. Which, in turn, must be completely emptied and all the gas that remains inside must be released. It should be noted that it is not necessary to use a foam cylinder, but you can take any other metal cylinder with approximately the same diameter. From the metal cylinder we took, we cut out a flat ring using a hacksaw. Next we work with the ring itself. We put the ring on something like a wooden handle, and using ordinary furniture nails and a hammer we make through holes as shown below. And opposite the row of holes we will make a large rectangular hole for feeding grain. Then take a metal plate exactly the same as in the photo below and use a large drill to make a through hole (exactly in the center of the plate). We clamp the platinum into the cleats and bend the edges (see photo below). Rough edges of the metal plate are smoothed with a file. As a result, we should get a plate, which in turn should fit inside the metal ring (made earlier), with a small gap. Then we will make a transparent wall of the mechanism, thanks to it you can see the number of grains inside and, based on its quantity, regulate the grain supply. For it we need to take a small piece of ORG. Glass from which a quadrangle of suitable size should be cut (see photo). ORG. Glass can be cut using an ordinary hacksaw. Four through holes should be made in the newly manufactured structural element. Holes are needed to attach this wall. Having made all the basic elements necessary for assembling the structure, we will continue assembling it. To do this, let's take four plywood square elements (those shown in the photo below) and connect them together into one exactly as shown below, in the end we will get a kind of sandwich. A 550 class brushed motor should be attached to the sandwich you just made. We insert the electric motor to the side where there are three small holes, these holes act as seats for our motor. Then, on the opposite side of the sandwich, we insert our flat metal ring exactly as shown in the photo. It should be noted that the outermost layer of our sandwich on the side of the metal ring should be on the edge of the ring itself (this is clearly visible in the photo below). Then you should put a metal plate on the motor shaft; for this we take a suitable adapter. First, install the adapter on the electric motor itself, and then on it a metal plate, which should be installed using metal washers of suitable size. The number of washers can be used to regulate the gap between the walls; it is advisable to install the plate itself exactly in the middle so that the gaps on both sides are the same. Next, close and seal the sandwich. To do this, we cover it with a pre-made transparent wall made of org. Glass is the threshing part of the structure, and into the holes made along the edges we insert screws of suitable size, which should go through and stick out a little so that the structure can be tightened with nuts. Then take four small plywood rectangles and glue them into one volumetric rectangle using superglue. We need this element to close the electric motor. We put the newly made blank on the electric motor and glue it. Then we will take a larger rectangle with a “U” shaped cutout on one of the sides, and install it by inserting the slot into the casing of the electric motor, and secure it with self-tapping screws. And we will fix the second rectangle of the same type on the same cladding, but, on the other hand, we will fasten it with a buoy not with self-tapping screws, but with hot-melt adhesive. Next, we take a large rectangle that will serve as the base of the homemade product and attach it to the rectangles we secured earlier as shown in the photo. Using superglue, we glue the facing parts to the threshing part of the structure (see photo). Next, from four already cut plywood trapezoids, we will make a hopper into which the grains will be poured. To do this, we will simply take them and glue them together using superglue, as is shown in the photo below. We will fix the bunker itself on top, above the threshing part. And from below, so that the ground coffee does not fall out anywhere, we will make a part similar to the previous one, but we will only secure it from the bottom (see photo). From two small rectangular plywood elements we will make and install a damper in its place using which, in turn, it will be possible to regulate the supply of grains. And finally, let’s connect and install the switch.
Coffee is the most delicious and aromatic invigorating drink. In most cases, lovers prefer ground coffee brewed in a Turk - this way you can feel all the splendor of the taste of this drink. But to grind the beans, you need a coffee grinder. In this article we will look at how to assemble this device yourself.
A little history
The birth of the electric coffee grinder was noted in history on April 3, 1829. On this day, James Carrington received a patent for his electromechanical invention. Until this point, grinding coffee was done manually, using a manual coffee grinder. Its structure was a smaller copy of a mill, and the crushing of coffee beans occurred by grinding them between two millstones. With the use of an electric motor, two designs of coffee grinders appeared. One uses the same traditional millstones, and this type is called a millstone. In another, the role of the grinder was taken on by metal knives rotating at high speed and therefore the coffee grinder is called a rotary grinder.
The burr type of coffee grinder consists of three sections. Whole grains are poured into one. In the second, they are ground and independently poured into the third section in the form of a ready-to-use powder.
Photo: types of coffee grinders
A rotary coffee grinder has one section in which the loaded beans are ground through a crushing mechanism and poured out manually.
Crushes beans with metal knives Grinds coffee with metal or ceramic millstones Driven by hand force
In addition, a modern coffee grinder is equipped with additional systems that allow you to use the machine’s capabilities more productively.
— Blocking the engine from starting when the cover is open.
Prevents grains from scattering when you try to turn on the motor with the lid open or not tightly closed. As a rule, all coffee grinders are equipped with this function. Blocking is especially important in rotary devices.
— Engine overheat protection.
Automatic motor shutdown when overheating. This function significantly extends the life of the unit.
— Pulse mode.
A very useful mode for crushing especially hard products. For example, when grinding dried rose hips or hawthorn berries before brewing. It consists in the fact that engine operation alternates with short pauses, during which the speed of rotation of the working shaft decreases.
— Timer.
Using a timer in rotary coffee grinders, the degree of grinding is regulated. The longer the grinding process lasts, the finer the outgoing product becomes.
— Grinding depth regulator.
Typically used in burr coffee grinders. Adjustment is carried out by decreasing or increasing the gap between the millstones. Numerous recipes for preparing coffee drinks are based specifically on different fractions of ground coffee beans.
So, for example, for cooking (cezve), you need the finest grinding “to dust”. For brewing coffee, espresso is slightly coarser, and for brewing in a French press, the coarsest grind is used. In total, specialists have up to 25 degrees of coffee grinding.
Equipping a coffee grinder with an electric motor has greatly facilitated the work of a housewife, since grinding coffee beans by hand is a rather tedious task.
Types of coffee grinders with millstones
Millstone devices are always more powerful than knife (rotary) devices and do the job faster. Based on the name, it is clear that the grains are crushed using a mill type. The millstones themselves are cylindrical or conical disks made of various alloys.
Coffee is a fairly hard product and requires adequate power to grind it. The motor performance range of a budget burr coffee grinder is from 100 to 200 W. Professional devices can be 350 W; they grind the hardest and most overcooked grains.
Soviet model
The most common model of past years is 3MM. If it does not break, then you still have to clean it and carry out preventive maintenance. In order not to be mistaken, you should know that the work has the following principle:
- Unscrew the knife. It is held in place by a slot that is fixed at the bottom. Unscrews counterclockwise.
- There is a nut under the knife. It can be unscrewed with any available tool.
- The plastic cup holder is removed along with the glass.
- What remains is the axle - it is restrained on the washer, everything is removed.
- The heating plate is fixed with grooves, so slight pressure and rotation are required.
- To remove the switch, you need to move the spring.
- The protective plate will be visible there - it can be easily removed.
- Next, unscrew the screws and fix the electrical wire. After this, the engine is removed.
This is how they begin to repair coffee grinders with their own hands. As you disassemble, it is worth examining each detail for integrity. On every household appliance, the knife is secured securely. If you break the thread when unwinding, then you won’t be able to disassemble anything further. Therefore, it is worth stocking up on lubricating fluids, spraying it on the bolt, waiting for a few minutes and only then continuing to work.
Many devices produced in Soviet times are suitable for this disassembly system (including the millstones for the coffee grinder). If the instructions are lost over time, then this recommendation is taken as a basis. When you remove the cover, it becomes clear what to do next.
Design and principle of operation of a coffee grinder
A coffee grinder is designed to grind coffee beans into powder. Let's look at the principle of its operation:
- beans are poured into the upper part of the coffee grinder;
- the millstones located inside grind the grains to the desired size using a handle that is located outside and, using the movement of the hand, causes the movements of the millstone mechanism;
- The ground coffee goes into a specially built-in collection container and is ready for preparation.
IMPORTANT!
The best choice would be a coffee grinder with a handle located on top.
Possible causes of failure, their elimination and repair
From time to time, any technology malfunctions. This happens either due to wear of the mechanism, or due to the occurrence of one or another emergency situation. A coffee grinder is no exception in this regard. Despite the extreme simplicity of the device, malfunctions occur in its operation. They can be roughly divided into two categories.
The first includes malfunctions that lead to a change in the quality of work. This is, first of all, insufficient grinding of the coffee beans. This happens when the device is used for a long time without routine maintenance. So knives and millstones need to be updated from time to time. If this is not done in a timely manner, the degree of grinding will gradually but inevitably decrease.
In rotary coffee grinders, the crushing blade must be replaced. Sharpening it at home will not lead to anything good, since there is a high probability of disturbing the balance of the product. An unbalanced knife will create vibration at high speeds and the quality of grinding will not noticeably change. Since the cost of a replacement knife is quite affordable, replacing it will not cause financial stress. Replacement is carried out by rotating the knife in the same direction in which it works. To prevent it from turning along with the drive shaft, the engine is jammed using a screwdriver. The old knife is removed, a new one is installed in its place.
In millstone machines, the millstones are changed. Millstones come in different shapes (plane-parallel and conical) and are made of different materials (stainless steel or ceramic). In addition, different companies that produce coffee grinders use different types of fastening for the millstones. All this complicates general recommendations for replacing them, but most often this operation is described in detail in the operating manual of the device. Having studied them carefully, everyone will be able to make the replacement themselves at home.
After replacing the millstones, it becomes important to adjust them for grinding fineness.
Key points when constructing a coffee grinder with your own hands
It is important to set the mesh accurately. The performance of the coffee grinder depends 100% on accuracy. It is necessary to make a protrusion at the bottom and ceiling of the working chamber, as shown in the second figure. It is important that the dimensions of the circumferences of the bottom and ceiling coincide; the mesh, due to its elasticity, will fall into place on its own and ensure the proper position of the parts. At the same time, it is easy to replace a leaky part if it touches it with an emery wheel. It is important to provide protection - the top of the head can be thrown out tangentially at high speed. The motor will stop if the shaft jams when the overheated windings melt the thermal fuse.
From the point of view of user safety, it is a good idea to make three ears on the bottom and ceiling of the chamber along the outer perimeter, through which the parts are fastened with bolts. The precautions described are sufficient for safe operation under human supervision.
Include a surge protector in the electrical part. Similar ones are sold ready-made for washing machines, which also have a commutator motor. If necessary, construct the part yourself from a capacitor. Or take a look at the website of washing machines, there is a diagram of internal electrical connections on any filter. Copy the element you like and place it at the input of your homemade coffee grinder. The described step will protect home appliances from the vagaries of voltage.
If speed control is required, the corresponding circuit can be borrowed (along with the engine) from a food processor. The advantage is that a household appliance of the specified class already has the necessary protection levels. Minus: most food processors do not have high efficiency for a simple reason - no one seriously measures the energy consumption of devices that operate for a maximum of 15 minutes. For our reasons, it is much better to provide protection against engine stalling. For example, washing machines have a magneto (Hall sensor) that controls the speed. This board on the thermistor selects the correct cutoff angle to maintain constant motor rotation.
Provide the coffee grinder with a ground connection. This will protect you from the risk of electric shock. The device is not intended for long-term operation. If you want to grind coffee in bags, you will have to install bimetallic plates to control the temperature of the motor. A spare part for an oil heater will do. The question is where to put the bimetallic strip. Take the initiative.
Types of problems and their elimination
In order for the fault to be corrected, it is necessary to consider the nuances of the repair. Breakdowns may vary in degree of complexity. Some of them can be fixed on your own, but fixing others may require the help of professionals.
To repair an engine or to determine its performance, you must have a multimeter available. In addition, you need to have some abilities and knowledge to use the device.
At home, you can repair minor breakdowns that can be fixed if you lack the skills.
Power cable failure and interlock failure
Damage to the power cable can be noticed visually without special diagnostics. If the bend area is located near the housing, then the breakdown can be detected quite simply - just move the wire. If the device fires and turns on, it means that the cable will need to be replaced.
Locking failure may occur due to clogging of the mechanism. It is located on the groove line area of the cover. Also, this breakdown can occur due to lack of pressure on the inner plate. You can easily check the blocking:
- for repairs you will need a thin screwdriver, with which you press on the protruding element;
- if when pressed the coffee grinder is triggered, then you need to disassemble it;
- Next you need to fix all the problems.
The device does not start
A household coffee grinder may not start due to several reasons:
- cable break inside the device. To repair, you will need to have skills in working with a soldering iron;
- perhaps a contact has come loose inside, which can be soldered in place with a soldering iron;
- If the device does not work, this may be due to complete failure of the engine.
Internal cables and contacts
If an engine breakdown occurs, repairs will require knowledge and experience. In this case, its repair will be ineffective, it can cost a good amount. This will require rewinding or purchasing a new motor. In these situations, it is better to buy a new coffee grinder.
Uneven movement of the knife, there is a sharp decrease in speed as grinding increases
The main reason for this breakdown is a partial breakdown of the motor or burnout of one of the windings. This also negatively affects the power of the device.
Anchor or engine
Repairing it can cause a lot of difficulties. It is advisable to take the device to a workshop for professional diagnostics. After this, the specialist determines the repair method - rewinding or complete replacement.
There is a burning smell during operation
The main reason for this malfunction is contamination or oxidation of bearings and sliding bushings. Additionally, the speed of the device will decrease. This problem is often observed with Bosch 6000 series coffee grinders.
Cleaning the device
To troubleshoot the problem you need to do the following:
- the device must be disassembled;
- All blocks are checked for ease of sliding;
- If necessary, the bearings are lubricated.
If this problem occurs in Bosch coffee grinders of the 6000 series, then the repair is as follows:
- it is necessary to remove the sliding sleeve from the top of the shaft;
- Next, the shaft is treated with an alcohol solution;
- If there is corrosion, it will need to be removed using special means.
Everything is done using available tools
Corrosion can be removed using fine sandpaper
When cleaning, be careful not to damage important parts.
Types of coffee grinders
At the moment, only 3 types of coffee grinders have been invented: manual, rotary and burr. Moreover, the last 2 options relate to electronic devices. A little more about each of them:
- Manual. Millstones are used for work; they rotate and grind coffee by mechanically acting on the handle on top of the product. A hand-made coffee grinder helps you get an aromatic and tasty drink.
- Rotary. It has a small volume, so it allows several people to prepare beans for a drink. The principle of operation is that there is a motor and a mechanism; it crushes a small amount of grains in a matter of time.
- Millstone. It is considered a high-quality and most common option. There are millstones located in the container; as they move closer to each other, they determine the size of the grains to be ground.
Based on the above, the conclusion suggests itself that a burr coffee grinder would be the best. In addition, this type of product can be made independently.
How to grind coffee and use the unit correctly
True gourmets of the drink claim that when preparing coffee, the most important thing is its correct grinding. There is a whole science that describes all the nuances of this seemingly simple operation. Due to the fact that the popularity of drinking coffee has recently become enormous, specialized professionals in this field of cooking have emerged. Sometimes their opinions differ. However, when it comes to grinding coffee beans, experts are inclined to believe that proper grinding occurs either in a manual coffee grinder or in an electric one equipped with millstones. A rotary coffee grinder grinds less evenly, and the resulting final product contains particles of different sizes. In addition, at high speeds of the knives, the coffee burns, which leads to a change in its taste.
The grinding time should not be long. As well as the time from grinding to brewing the drink. The longer the coffee is ground, the more essential oils evaporate. Therefore, the optimal grinding time is considered to be no more than 20 seconds.
Over time, the coffee grinder began to be used not only for coffee. You can crush nuts, eggshells, cereals, salt, sugar and other bulk food products in it. For example, at home using a coffee grinder you can make powdered sugar from ordinary loose sugar.
In culinary practice, powder mixed with fragrant nutmeg is also used. To do this, first grind a well-dried nut, and then add sugar to it and grind it all together.
It is not recommended to grind products that have a persistent odor in the same coffee grinder. For example, you should not crush pepper in it, the persistent smell of which can then be transferred to the coffee drink.
Advantages and disadvantages
Both electric and manual coffee grinders with conical burrs have many advantages compared to other types of units:
- only millstones can provide high-quality grinding;
- multifunctionality of devices makes life easier;
- it is possible to obtain raw materials for various coffee drinks;
- reasonable cost;
- opportunity to save effort and time.
There are only a few disadvantages:
- breakdowns are possible when foreign objects get into the millstones;
- Sometimes difficulties arise in obtaining the finest fractions.
The device is frozen and does not respond
Modern electric coffee grinders are much more convenient than older models, in which the beans had to be ground manually - now the equipment will do everything for you, and the task will only take a few seconds. However, such progress also has a downside. So, in some cases, after turning on, the equipment may simply freeze, not responding to any user actions. In certain situations, the device may also freeze while running some programs, and the device often does not even respond to the power button.
Often there are only two reasons for such a malfunction. The first is to use the coffee grinder inappropriately: the device may freeze due to an attempt to grind other products in it, for example, nuts or sugar. Another common cause of a malfunction is the failure of the electronics - this can happen either due to the natural wear of parts or due to the burnout of some elements as a result of a voltage drop. Repairing a coffee maker in this case is a technically complex process that only a qualified specialist can handle. Therefore, at the first sign of a malfunction, you should contact a professional.
Is some part or coffee grinder lid broken? Repairing it with your own hands is quite simple, although many people think quite the opposite. True coffee connoisseurs prefer to drink it from freshly ground coffee beans and neglect instant drinks. This coffee retains its aroma and unique taste longer. More recently, coffee beans were ground using manual coffee mills, and only after the advent of various household electrical appliances did the process become significantly easier. But very often, due to non-compliance with the rules for using equipment or ignorance of them, electric coffee grinders fail. In our article we will tell you how to identify the cause of the malfunction and how to repair the coffee grinder yourself.
The most reliable coffee grinders
Coffee grinder Bosch MKM 6000/6003 on Yandex Market
Coffee grinder Kitfort KT-1329 on Yandex Market
Coffee grinder De'Longhi KG 89 on Yandex Market
Coffee grinder Oursson OG2075 on Yandex Market
Coffee grinder De'Longhi KG 520.M on Yandex Market
We don’t know for what reasons people decide to make a coffee grinder themselves, but we will offer a couple of designs. Moreover, there is no acceptable design for making coffee on YouTube. So, make your own coffee grinder at home.
The designer sees difficulty in regulating the grinding coarseness. A method is needed to obtain fine coffee. The designs with knives proposed on YouTube are not suitable, the coffee flour will be mixed with crumbs, you will need to sift the result, which is unacceptable. A device is required that gradually releases the powder in order to be used as intended. From this point of view, an emery wheel is better suited for a homemade coffee grinder. The grinding speed seems slow, but the quality will please you.
As we see the process:
The colors in the picture show the components. The working chamber is limited to light green. There is a bearing with a seal in the bottom to prevent coffee from spilling into the engine compartment. The finished product is collected along the perimeter (only a segment of the side wall is removed from the sieve). To collect, put a homemade coffee grinder in a saucepan. Let us remind you that the engine compartment has no openings, therefore, we will provide protection for the engine from overheating. It is recommended to include a couple of protective devices in the winding.
Typical thermal fuses are rated at 135 degrees Celsius and are pressed tightly against the wire of the motor coils. Additional point: the motor of the vacuum cleaner is a collector, the homemade coffee grinder is very noisy. If necessary, take an asynchronous motor from the refrigerator; by the way, the device also has a start-up relay (or from a kitchen hood), which ensures safe operation. Brushed motors are renowned for their ease of regulation and ability to operate at frequencies in excess of 50 Hz. In addition, they develop good torque and are little affected by power surges.
Disadvantages of commutator motors:
- High noise level. The brushes rub, the rotation speed is significant.
- Sparking in the collector, therefore, a high level of interference.
When choosing a commutator motor, it is necessary to protect the brushes with varistors (the first end is placed on the brush, the second on the motor housing. There are two varistors - one on each side), it is necessary to build a surge filter into the device.
How to disassemble the device
The most popular model is the Bosch rotary coffee grinder. You can put about 75 g of grains into it at a time, and stainless steel knives can grind them into the finest dust.
If the Bosch mkm 6000 coffee grinder does not turn on, you first need to disassemble it and get to the insides hidden in the plastic case
The Bosch coffee grinder must be disassembled carefully: turn it upside down, squeeze the body, turn the bottom and then the latches will open. How to repair a Bosch coffee grinder depending on the breakdown:
check the circuit with a tester;
clean parts;
lubricate the moving mechanism.
If the motor burns out, take it to a service center or buy a new one.
Selection factors
When choosing a burr coffee grinder for your home, you need to consider a number of important points:
- type, material of millstone;
- the ability to adjust the degree of grinding of coffee beans;
- ease of cleaning;
- the presence of restrictions on the resulting powder and grinding time;
- the presence of compartments for grains and the resulting product;
- power;
- additional functions.
Grind adjustment
Control of the initial state of the powder is very important, therefore millstone-type devices are equipped with adjustment of the degree of grinding. Adjustable mills are a must for large scale applications, such as a coffee shop with this service.
The grinding speed is determined by the speed of the motor. This directly affects the productivity and quality of the coffee. Low operating speed will prevent overheating of the millstones and the coffee itself, but productivity will suffer. Conversely, at high speed you will have a lot of coffee, but the aroma will begin to dissipate due to overheating.
The following help to adjust the degree of grinding: a special slider, regulators or a ring (at the back or bottom of the device). Changing their position changes the distance between the millstones and the size of the coffee particles. Most often, factory tinctures produce larger grains, but using the instructions, you can always adjust them. The process itself is best done with the device running, but without grains.
In addition to the degree of grinding, it is important how evenly the entire coffee turns out. In budget coffee grinders, in addition to the given size, there are always smaller fractions. But if the device says “precision millstones,” then you will get high-precision grinding with pieces of the same size.
Types of fats
Millstones are conical and plane-parallel. The former work slower, so they are better suited for coffee. In them, the risk of cauterization of the product is reduced to zero. They cost a little more, but it is recommended to give preference to conical ones.
Stone millstones are characterized by increased strength and wear resistance. Ceramics have also proven themselves well. Metal elements are less reliable.
It is recommended to give preference to devices with adjustable grinding degree. Thanks to the presence of this function, it will be possible to obtain fractions of different diameters. This is an extremely important factor for those who like to prepare the drink in various ways.
The ease of maintenance of the device deserves special attention. Therefore, you should pay attention to models with removable compartments for whole grains and the resulting powder.
It would be useful to have a timer on the device. With its help, you will be able to grind exactly as much raw material at a time as is needed to prepare the drink.
Glass is considered the best material for containers for crushed fractions and grains. The optimal volume of compartments is in the range of 120-200 grams. The engine power ideally ranges from 150 to 180 W.
The following additional points will be important:
- automatic shutdown in case of blockage;
- presence of a measuring spoon;
- compartment for power cable;
- dispenser;
- sound insulation;
- tempera;
- presence of rubberized feet and cooling fan
Convenient cleaning
Once a month is enough to clean the coffee grinder, depending on the frequency of use. With the device turned off, unscrew the screws that hold the millstones. Wipe them and brush them. It is not advisable to wet discs with water.
At the time of purchase, ask the seller to assemble and disassemble the device. Removable containers are the most convenient for cleaning. If it is not removable, but extends, check whether your fingers can reach the farthest corners. Otherwise, the coffee types will mix. Trays for ground coffee must be completely sealed and fit perfectly to the body, otherwise the product will lose taste and aroma.
The best 12 volt coffee grinders
Rating:
- The most convenient model AUTO Clatronic 291 .
- The most beautiful Profi Cook PC-KSW 1021 .
- The most wear-resistant Sinbo SCM-2927 .
This type has compact dimensions, so the products are light and transportable, convenient to take with you. Devices with low power and small capacity grind coffee beans slowly.
The products are made of heat-resistant and durable materials. Productivity – 2-3 kilograms per hour.
Characteristics:
- type of mechanism (millstone);
- metal case;
- power – 110-115 W;
- 1-3 minutes of continuous operation;
- capacity – 50 g;
- number of grinding levels – 1-3;
- productivity – 2-3 kg per hour.
Pros:
- compactness;
- ease;
- ease of use;
- low price.
Minuses:
- low functionality;
- small capacity;
- long grinding of grains.
DIY coffee grinder
We offer two options for assembling this device with your own hands: manual and mechanical.
For manufacturing, you need to prepare the following materials:
To make a stand for a homemade coffee grinder, we will prepare a sheet of chipboard or plywood measuring 14 cm by 14 cm and four sheets of cardboard measuring 13 cm by 13 cm. Then we glue three cardboard sheets together and take measurements of the shelf, which is installed at a distance of 4 cm from the bottom of the structure. Glue the last sheet of square cardboard and cut a hole for the box above the shelf. We cut out and assemble the box according to the appropriate dimensions of its parts so that it fits into the prepared hole, then we attach a handle to it. We glue a square of chipboard and a square-shaped board on top in the form of a stand for the unit itself.
To make the grain grinding device itself, we will take: a sour cream glass, an ice cream stick, a furniture handle, a bottle cap, a board in the shape of a circle with a diameter of 2 cm and a cardboard circle.
We glue a stainless lid to the stand, fasten the cup on top, and on top of it we install two circles of different diameters, the first from cardboard to cover the entire surface of the cup, the other from a board. We fix the furniture handle to the stick, and then to the board. We glue a cork to the other end of the stick for convenience.
To decorate, we paint our device with acrylic paint, the color you like, let it dry and glue the grains or other decorative elements. This DIY device will be an excellent kitchen decor.
How to assemble a mechanical coffee grinder
To make a mechanical device you will need the following tools:
Having prepared all the materials, we begin to assemble our device:
- We take an unnecessary electric motor, the power of which is from 300 W to 700 W, and disconnect its parts. Disconnect the rotor from the stator.
- Using a drilling machine, we make holes inside the rotor with d = 10 cm and a depth of 0.7 cm, at a distance of up to 1.5 cm from each other. We place the holes along the length of its rod from top to bottom, along the lines that are located at an angle.
- We connect the prepared holes with grooves, 0.4 cm wide and 0.5 cm deep. The grooves are well secured in a vice and made with a corner grinder. Very carefully process the grooves that are located at the bottom of the rotor.
- Using sandpaper, chamfer the top of the rotor so that the height is about 1.5 cm and the depth is 0.8 cm.
- We insert the rotor into the stator and make small holes for the grains in its covers.
- We will make the loading container from a sheet of tin, the dimensions of which will depend on the size of the engine.
- We attach a handle to the top of the motor shaft, which will give the rotor a rotational movement. We secure the handle in the rotor with a bolt.
- We screw the resulting device to a board, inside of which you first need to make a hole - ground coffee will come out through it. We place a small container under the coffee grinder into which the final product will be poured.
- When this device is ready, you need to make several turns in one direction and the other.
How many grams are in a tablespoon of boiled buckwheat?
10.10.2020
Puff pastries with banana filling
10.10.2020
Making jelly with kiwi
10.10.2020